Showing posts with label baking. Show all posts

Sunday, January 22, 2012

Weekend Wrap Up!

Hey friends!

 Hope everyone has had a good weekend so far. Mine's been busy, full of classes and cleaning mostly, with a teeny bit of crafting thrown in.

This semester I registered for two classes: Fruit and Vegetable Production, and a Sheep practicum at the EKU farm. That means that every day except Saturday, I'm at work or school. Whew! Busy season again. Fruit and Veg is looking to be an awesome class. We plan out a large market garden, and we also try raising and selling a crop (ours are some Chinese cabbage types.) Sheep is HYSTERICALLY FUNNY. It's run by the sheep and pig manager, but there's definitely more to do with the pigs (the beauty of sheep is that they are super-low maintenance. Doesn't make for a very action-packed class though.) So I've been learning a heck of a lot about pigs. Mostly about how much they smell. Can I tell you how much they smell?

They smell so much that even after coming home and washing my clothes and SEARING the smell off myself, I CAN STILL SMELL IT. I catch whiffs of it EVERYWHERE. The smell of lard is overpowering when I cook. All I have to say is that I will never. NEVER. buy commercial pork again. Commercial pork raising is possibly the most disgusting thing I've ever seen, and EKU's farm is tiny in comparison to most, and pretty cutting-edge with technology. It's still. effing. gross. I've raised pigs on pasture, and happy free pork is incomparable. Pigs love to root. They love to roll in mud. They like to run around. Sometimes, they even like to catch and eat birds (true story.) Things pigs should never have to do include roll in their own poo instead of mud (pigs are actually fastidious), or stand in one place for their entire lives. Or be artificially inseminated.
It really looks like this.
 I'm all about pork, I love bacon, and I am all about eating pigs before they eat me, but I'm pretty sure I will go out of my way from now on to find pork that is pasture-raised. Anything is better than pork that lives on concrete and only eats corn and soybeans. Even if it means they snack on the occasional sparrow. 

In other news, we've already had a set of twin lambs born. Effing cute. Hoping there are more coming this week! There should also be piglets by Tuesday! Baby season! I think by now I'd actually feel better about eating lamb than pork. At least sheep aren't raised in barns without access to grass and sunshine and air. Ugh. People, this is why farming has a bad name.

Meanwhile, in Craft World:

Sebastian found a new bed. That's a dress I'm supposed to be hemming for a friend. I blame him for my slow turn-over.

I also cut out pieces for my next big project, a tshirt quilt. Everyone should know by now that I'm pretty much a hoarder (ok, there's no "pretty much" about it.) I've been lugging around dozens of tshirts for years because they mean something to me (bands I like, places I've been, gifts that have been given to me.) With the prospect of moving again looming on the horizon, I've been trying to do something about the "stuff" situation, starting with clothes. Friday, after pig class, and a butt-busting Zumba class with all the girls, they all came over to rifle through all the clothes I've decided to give away (the girls, not the pigs.) I definitely made a significant dent in my collection, but couldn't give away my beloved tshirts. And so, with friendly chatter cheering me on, I cut out 31 12" tshirt squares to be made into a quilt. If I can find 5 more, I can make a quilt that is 6'X6', which is intense. Or I can make a 5'X6' quilt and a pillow. Can't decide. Any thoughts, dear readers?


The stack!

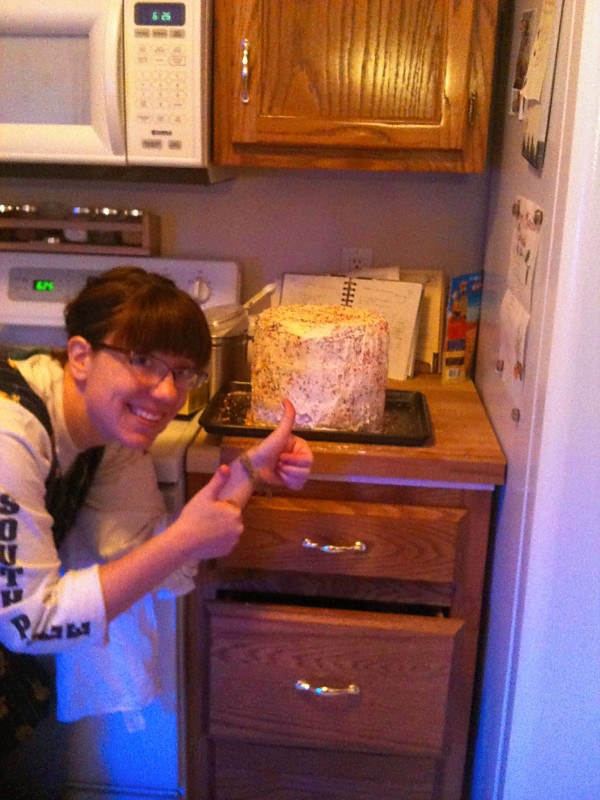
I also finally found myself a cake plate! I've been looking for one for quite some time. Throwing cakes on a dinner plate never works out quite how I imagine it will. And so I christened it with a cream cheese banana cake, which is delish!
I'll leave you all with that!

Have a happy start to your week, everyone!
~Sarah

Monday, December 12, 2011

Let's go Cherpumple-ing

Do you ever find yourself invited to a holiday party and you just don't know what to bring. Next time, consider the (not-so) humble Cherpumple! What's a Cherpumple you say... Well, it's pretty much the mongoloid child of the baking world. 3 pies are baked inside three cakes, which are then layered on top of each other. It's an abomination, in all honesty. It sounded ungodly, but some of my co-workers and I just really wanted to see this bad-boy in real life. And so we baked.

And baked.

And baked.

Cherpumple is not as easy, or as hard, as they make it sound, and so I will share with you our Cherpumple wisdom.

To start with, you take 3 store-bought pies (homemade if you're feeling fancy), and 3 boxed cakes. Mix the cake normally.
We're still excited here.
 You then combine the pies and the cake in a 9" spring form pan. Here's Word of Wisdom #1: Put some cake mix in the pan first, and then lay the pie in that. This keeps the bottom of the pie from dropping out of the bottom when you take it out.
Trust me
Also, Word of Wisdom #2: If your pie has a solid covering (like apple), poke a bunch of holes in the top crust. This will fill it with cake (yum) and keep it more structurally stable.
Mutilated pie
Most Cherpumple directions then say to bake according to box directions. This is a blatant lie. We put ours in for 25 minutes, like the box said, and checked back every 15 minutes after that. It took 2 hours total. That's a lot of 15 minute breaks. Word of Wisdom #3: Cover the entire pan with tin foil, tent-like. This traps the heat a little better and helps the top to cook. We didn't do this and pulled ours out, thinking it was done. It was not. It was raw on top.
Gross

I try not to give friends salmonella. So, two hours later, they were finally done.

Let the cakes cool completely. We put ours on wire racks to help it out. Taking the cakes out was actually very easy. You just remove the sides of the pan, put a cutting board on top, and flip the whole thing. I then flipped mine again onto the rack to cool some more. It's a lot of flipping, but it's worth it. They are also ridiculous.
That's three and a half pounds.
We then just made some basic butter cream frosting and stacked the cakes.
That's a foot of cake
A layer of icing on the outside...
And an absolute hailstorm of sprinkles later...
And it was done. Total time: Probably close to 6 hours. Literally. Cherpumple is a 2-day operation.

Cherpumple also takes two people to transport. You have to sit in the car and have someone hand it in to you. It weighs about 15 pounds. It's a big cake.
Cutting it takes a big knife. But it's like a Geology lesson in there.
All-in-all, Cherpumple was worth it. Until halfway through a slice when I wanted to cry, or throw up.
Some baked goods were meant to be enjoyed in small doses.

I wish you all the best of luck on your Cherpumple adventures! Feel free to share your tips and tricks (and photos!) with the rest of us! Any unusual pie/cake combinations out there?

Happy Monday everyone!
~Sarah


Monday, November 28, 2011

Bad Blogger

Hey guys! Long time no blog. My bad, but I honestly haven't been on a computer since Tuesday last week, and I have to say it felt really good!

Hope everyone had a good thanksgiving holiday! I went and visited my friends Jordan and Jackson out in Bowling Green for a few days and ate dinner with their family. I brought along my mother's famous chocolate pudding pie, which came out absolutely dreamy with all the milk and cream from Miriam :-)
 It was the best lard crust I ever made, even though I ended up having to use a wine bottle as a rolling pin! I think I left mine at my previous house. Need to get that.

For black friday, we went thrift shopping at a (not-so) little place called Grandma's Attic, right down the street from their house. I'm mildly obsessed with that place, and usually end up spending way more than I intend to! This time I made it out at about $20, which is awesome for me, and I'm sure I will thrill you with all of my finds in my next post ;-) We also hit Lowe's, and I scored a Dremel (which I've been drooling over) and a HUGE kit of drill bits and screwdriver bits. That's what kind of girl I am. We spent the rest of the day re-painting their living room from a pumpkin orange to a limestone grey. It was a good day. All of the days included snuggles with this lovely lady:

Miss Kenton. She's a doll. Couldn't get enough of her. Forgot how funny kittens are to watch.

Other than that, the end of the week passed with a lot of coffee, conversation, and knitting with friends.
It was a good one.

Now that I'm back home, the holiday decorating has started in earnest! I decorated my window upstairs with some crocheted snowflakes.

I also have a christmas cactus there on the left, which I'm pretty excited about. You can see what I've finally come up for as far as window treatments go. I hate having my blinds down all the time (I like the light, and the cats and dog just trash them trying to look out the window.) I've been trying to come up with something that wouldn't have to be pulled shut every day, but would block the view from the rest of the neighbors (my window looks right over the front of our building.) What I came up with is to literally contact paper the bottom half with "clear" contact paper, which isn't clear at all but gives the window a frosted look. I'm quite pleased with it, and now I can wander around in a towel all I want! Hurray!

Last of all, I finally have a craft project I can share, since it isn't a present! Using the idea from this blog I made these adorable milk jug snowmen for the circulation counter!
Their faces are just construction paper. The ear muffs are yarn pom poms I made and a zip tie that's just stuck in to two slots I cut in the jug. The hat is part of a knee sock. I just cut the toe off (good use for all those single socks languishing in the closet) and tied a the top with a ribbon. The scarf is just a braided bit of yarn. Of course, they wouldn't be any fun unless...
THEY LIT UP!

Isn't that adorable? I just cut out little square flaps in the backs (just cut three sides so you can close it back up), shoved some lights inside, and viola! A festive holiday scene for the circulation desk, complete with some withdrawn books and poinsettias ;-)

Hope you all have a happy Monday!
~Sarah

Monday, September 26, 2011

Make Do

"Use it up, wear it out, make do, or do without."

Words of wisdom, no doubt, but ones that are hard to adhere to strictly in a consumer-driven society. I am certainly not the best example of this adage, but I do try to do my best whenever I can.

Tonight was a pretty good example of how I both embody and flout this notion, simultaneously. It all starts with a confession: I have a shoe problem. A pretty bad one. And sure, I'm a girl, and that's to be expected. But I still feel terrible about my 60+ pair shoe collection (granted, a lot of them are second hand.) I've been trying to keep myself from buying more, and trying to wear them all or get rid of them.

While feeding my caffeine addiction in the coffee shop at work, I noticed that the rope on one of my favorite pair of wedges was completely falling off.


And aren't they adorable?

"Wear it out."

Unfortunately, let me reiterate that they're one of my favorite pairs. And I usually don't do anything but flats.

So... "Make do."


That's right. I stapled my shoe together.

Certainly, this is not a permanent fix. But it will certainly keep me from walking around with half my shoe flopping off.

I refuse to "do without."

So why is this such a big deal to me?

I guess it's that I hate seeing people take a perfectly good item and literally throw it away (not donate, not give to a friend, not find a new use for) simply because it has a cosmetic flaw or something so simple as a missing button. Did your dryer put a pinhole in your favorite sweater? Darn it! Put a patch on it! Embroider over it! For God's sake, don't just throw it out.


In related, but not really, news, I had leftover pumpkin pie filling last night, and so I made little pumpkin handpies.


Hand. Pies.

I just used store bought crust, so they aren't as delectable as they could be, but it was pretty good for 2 am ;-)

Last up: What's in my book bag today?


I work in a library, so usually there are a LOT of things in my book bag, but this is what I'm currently digesting.


I worked in Montessori schools for two years and really loved it, both as a job and as a teaching method. I've been missing it lately, so I'm brushing up with this oh-so-up-to-date volume ;-)

So what's your favorite ways to Use it up, wear it out, make do, or do without?

Hope everyone's having a good week!

~Sarah

Thursday, September 22, 2011

Ants in my pants!

Hey everyone! Yay for Thursday posting, which I can actually remember!

Today, I have a pretty girly post! You know what I hate, as a girl? Jeans that NEVER fit right. If they fit through the hips and thighs, they're huge in the waist, and vice-versa. I also have a ridiculously large difference between my hips and waist, which makes it even harder! I don't know why they seem to build jeans only for straight up and down people, but they do!

Anyway, the other day on Pinterest*, I saw a post about tailoring the back of your jeans with... get this... elastic. No joke, elasticizing your jeans. Like a 4 year old. I have a particularly notorious pair of jeans, in which I always feel like I'm flashing people my buttocks, or like I could store snacks in the extra space... so I decided to try it.

Yes. I put elastic in my jeans.

And you know what? I LOVE IT. No joke, best thing ever. Here are some butt pictures to prove it. Really. I put pictures of my butt on the internet. Anything in the name of crafts.


Lays flat!


Look, mom, no gap!

So how did I do it? HOW DID I CREATE SUCH MAGICAL TROUSERS, YOU ASK?

Easy.


All it is is a piece of elastic in the waistband. You cut two slits (I lined mine up with the outside edge of the pockets, but I might go all the way to the sides next time), insert the elastic, and sew the elastic down on each side!


TADA! I used crazy thread, just in case it sucked and I had to rip it out.

I did have to take the Levi's label off mine, since it was sewn through the waistband, but I'm fine with that. I don't want your stinkin labels on me anyway!


They look a little bit like kid's pants when they're laying flat, but they look just fine when they're on, and I never wear anything short enough to show the top of my pants anyway! BRILLIANT.

*Pinterest.com is an awesome website. It's basically a way to bookmark websites and pictures and share them with other people. There are always great recipes, decorating tips, craft ideas, you name it! You can find both Patricia and I wasting a lot of time on there ;-)

In less-exciting news, my vanilla is coming along nicely!


Hurray!

I also set up a little craft corner in my new room today, so I can keep on craftin while I keep on movin!


That's all, kiddos! See you on Monday!

~Sarah

Tuesday, August 16, 2011

What's for dinner when you can't cook?

I love Patricia's ideas for meal planning. Having everything on a set schedule sounds heaven sent, but what happens if YOU aren't on a set schedule? Are you doomed to eating Taco Bell 4 meals a day? My job involves having a weird schedule, hands down. I usually don't get home until 9 or 10 o'clock at night, and I'm lazy and don't wake up until I absolutely HAVE to. So what's a girl to do when she wants to eat like a normal person, but not be banging pots and pans together at midnight?

Meet your best friend:


image from: http://www.psfk.com/wp-content/uploads/2008/10/freezer.jpg

Unfortunately, my freezer doesn't look like that. Honestly, my freezer is stuffed full of crap, including our chest freezer downstairs. Why? And what does this have to do with being lazy?

So, think back to your post-high school days... if you were anything like me, you probably lived off microwaveable frozen foods. Because they are easy. You know what else they are? They are just foods made and then shoved in the freezer to be reheated later. You know what you can do? Make burritos and shove them in the freezer. It's just that simple. No, they probably won't last until Armageddon like Totinos pizza rolls, but they are also much tastier if made with exactly the ingredients you like.

Personally, I do this with just about everything. Especially if you live on your own, this is a great way to cook without having to quarter recipes. I usually take a day on the weekend and cook a few different types of each meal, for example, I might make breakfast burritos, scones, and pancakes for breakfast, and then a few different types of lunch/dinner meals, like a soup, lasagna, or a chicken dish. This works great for taking your lunch to work, since you just have to pop something out of the freezer and it defrosts by lunch time. It's also great if you're lazy in the morning, because you can pop a homemade waffle in the toaster just as easy as an Eggo, and it's not full of terrible junk.

So last night, I can home and got in a cooking mood and made:


vegetable lentil soup.
Soup always looks terrible, but tastes so good.


Bacon Cheddar Scones


which turned out AMAZING. I'll post the recipe tonight. It was adapted from a metric recipe, so it's definitely a guessing game...

This morning, I paired one of those puppies with some fresh eggs, one of which had the most enormous yolk.


Thanks girls.

So don't be afraid of meal planning, even if you're a crappy planner, or "don't have the time." Cook it up as you get a chance, and pop it in the freezer! It'll save you a world of worry later (and you can choose from multiple things rather than sticking to a plan!)

**UPDATE**

Here's the recipe for the bacon cheddar scones, adapted from this blog.

1 1/3c flour
2 TBSP baking powder
salt & pepper
1/3 c butter, softened
1 egg
1/2 c buttermilk
1/3 grated cheddar cheese
BACON. The recipe calls for 4 slices. I used much, MUCH more. Like 1/2 lb.

In a bowl, stir together flour,baking powder,salt/pepper,cheese and bacon. Now pour in the egg,milk,yogurt and butter. Stir until JUST incorporated. With scones,you want to mix them as little as possible to keep them nice and tender. Over mixing = hard scones which is not good. So incorporate in the wet ingredients,and then turn out onto a floured board and shape into a circle using your hands. Slice the circle into 8 wedges. Brush each wedge with milk and sprinkle pepper on top. Bake for 15 minutes until golden brown on top and cooked through.
Makes 8 scones.

You might need to adjust the liquid/dry ingredients depending. I used a LOT more cheese and bacon. Just play with it. It's baking, not rocket science!

Friday, August 5, 2011

CAKETOPIA!

I doubt it will be any surprise to you, our dear readers, to hear that I, Sarah Elizabeth, have...


a cake problem.


This is in small problem. We're not talking "Oh, I like a bit of cake on my birthday!" We're talking "HolycrapImakelikeacakeaweeksothatIcanhavecakeeverydayandsometimesmorethanonceaday."


Yeah. That bad.


I know it's a foolish endeavor to try and cure myself of this cake fever, and so I've been challenging myself to only make *friggin awesome cakes*. I feel like I've done pretty well so far. I usually make them from scratch (angel food with buttercream and raspberries for a friend's birthday), but sometimes I cheat (boxed cake with rainbow chip icing/chocolate for my own birthday!) However, Pinterest has really upped the ante, showing me pictures of AMAZING things to do with cakes.


Including this baby:


It's rainbow. Cake. In a jar.

Holy crap.


And so I must have it.


Five bowls of batter later, and I was on a roll.

The directions call for "neon" food coloring, but while I was shopping I saw that said food coloring was $4, almost as much as the 12 pack of reusable glass jars, and I gave a big "Oh no you di'int" in the middle of the grocery store. Also, the colors weren't that "neon", just ugly. Anyway!


Mine were messy, but looked like delightful rainbow pudding at this point (and were just as tasty.) I'm sure some of you are having *slight* concerns about my methods here... foreshadowing!

I popped these babies in the oven and took a peek a little while after to see if they needed to be turned (our oven bakes SUPER unevenly.) And I saw this:


You many think "Oh, lovely, puffy rainbow cakes!"

But at this point I was thinking "OH HOLY CRAP I FORGOT THAT CAKE RISES." You know how when you make cupcakes, you only fill them 1/2- 3/4 full? Well, the same rule holds for cakes made in jars...


Cake failure, in all the colors of the rainbow.

Now, I'm not going to lie, as much as I was disappointed in my cake failure, I was really looking forward to EATING ALL THOSE CAKE SCRAPS. After a bit of surgery (scraping the sides, and scooping out a little off the top), they were ready for icing!

Lesson:

Fill 1/2 full. Yes, you may want to see all the colors before they're baked, and you may think the purple layer isn't thick enough now, but just wait. Really.

I look forward to RAINBOW CAKES EPISODE 2, coming soon to a kitchen near you. Tonight however, is homemade chocolate cupcakes with strawberry frosting, for a double-birthday!!