Hey guys! Long time no blog. My bad, but I honestly haven't been on a computer since Tuesday last week, and I have to say it felt really good!
Hope everyone had a good thanksgiving holiday! I went and visited my friends Jordan and Jackson out in Bowling Green for a few days and ate dinner with their family. I brought along my mother's famous chocolate pudding pie, which came out absolutely dreamy with all the milk and cream from Miriam :-)
It was the best lard crust I ever made, even though I ended up having to use a wine bottle as a rolling pin! I think I left mine at my previous house. Need to get that.
For black friday, we went thrift shopping at a (not-so) little place called Grandma's Attic, right down the street from their house. I'm mildly obsessed with that place, and usually end up spending way more than I intend to! This time I made it out at about $20, which is awesome for me, and I'm sure I will thrill you with all of my finds in my next post ;-) We also hit Lowe's, and I scored a Dremel (which I've been drooling over) and a HUGE kit of drill bits and screwdriver bits. That's what kind of girl I am. We spent the rest of the day re-painting their living room from a pumpkin orange to a limestone grey. It was a good day. All of the days included snuggles with this lovely lady:
Miss Kenton. She's a doll. Couldn't get enough of her. Forgot how funny kittens are to watch.
Other than that, the end of the week passed with a lot of coffee, conversation, and knitting with friends.
It was a good one.
Now that I'm back home, the holiday decorating has started in earnest! I decorated my window upstairs with some crocheted snowflakes.
I also have a christmas cactus there on the left, which I'm pretty excited about. You can see what I've finally come up for as far as window treatments go. I hate having my blinds down all the time (I like the light, and the cats and dog just trash them trying to look out the window.) I've been trying to come up with something that wouldn't have to be pulled shut every day, but would block the view from the rest of the neighbors (my window looks right over the front of our building.) What I came up with is to literally contact paper the bottom half with "clear" contact paper, which isn't clear at all but gives the window a frosted look. I'm quite pleased with it, and now I can wander around in a towel all I want! Hurray!
Last of all, I finally have a craft project I can share, since it isn't a present! Using the idea from this blog I made these adorable milk jug snowmen for the circulation counter!
Their faces are just construction paper. The ear muffs are yarn pom poms I made and a zip tie that's just stuck in to two slots I cut in the jug. The hat is part of a knee sock. I just cut the toe off (good use for all those single socks languishing in the closet) and tied a the top with a ribbon. The scarf is just a braided bit of yarn. Of course, they wouldn't be any fun unless...
THEY LIT UP!
Isn't that adorable? I just cut out little square flaps in the backs (just cut three sides so you can close it back up), shoved some lights inside, and viola! A festive holiday scene for the circulation desk, complete with some withdrawn books and poinsettias ;-)
Hope you all have a happy Monday!
~Sarah
Monday, November 28, 2011
Tuesday, November 22, 2011
Completion Feels Fabulous!!!!
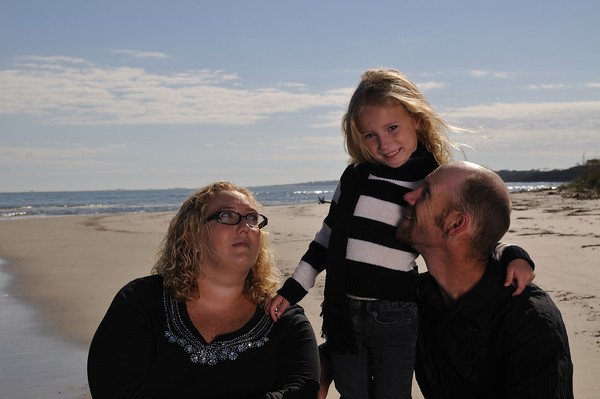
So as of tonight I officially have 5 gifts complete for my handmade Christmas!!! It feels so nice to know that I did it myself and that they are done. Of course I still have several more to complete, but its not even close to my drop dead time!!! Oh and we had family holiday pictures taken last weekend! Here is a sampling for your viewing pleasure! And you have to just love the knee high boots Diva is wearing I adore them!!! The black and white theme we went with was perfect for the beach setting!
Today's recipe is for Soft Brown Sugar Cookies, with Thanksgiving looming these cookies look perfect for a desert snack between courses on Turkey Day! I found this recipe through pinterest on http://cafescrapper-scrapsoflife.blogspot.com/2011/02/gooseberry-patch-cookbook-giveaway-with_21.html
Ingredients:
2/3 c. butter, softened
1-1/2 c. brown sugar, packed
2 eggs
1 t. vanilla extract
2-1/2 c. all-purpose flour
1/2 t. baking powder
1 t. baking soda
1/2 t. salt
1 c. sour cream
Directions:
Blend together butter and brown sugar. Add eggs, one at a time; blend well. Add vanilla; beat until light. In a separate bowl, stir together flour, baking powder, baking soda and salt. Add flour mixture to butter mixture alternately with sour cream; mix well. Drop by rounded tablespoonfuls onto non-stick or lightly greased baking sheets. Bake at 350 degrees for 8 minutes. Remove to a wire rack; cool. Frost with Browned Butter Frosting. Makes 2 dozen
Browned Butter Frosting
1/4 c. butter
1-1/2 c. powdered sugar
2 T. Milk
Melt butter in a saucepan over medium heat until it turns golden. Watch carefully as this will happen quickly. Remove from heat. Stir in powdered sugar and enough milk to make a spreading consistency.
2/3 c. butter, softened
1-1/2 c. brown sugar, packed
2 eggs
1 t. vanilla extract
2-1/2 c. all-purpose flour
1/2 t. baking powder
1 t. baking soda
1/2 t. salt
1 c. sour cream
Directions:
Blend together butter and brown sugar. Add eggs, one at a time; blend well. Add vanilla; beat until light. In a separate bowl, stir together flour, baking powder, baking soda and salt. Add flour mixture to butter mixture alternately with sour cream; mix well. Drop by rounded tablespoonfuls onto non-stick or lightly greased baking sheets. Bake at 350 degrees for 8 minutes. Remove to a wire rack; cool. Frost with Browned Butter Frosting. Makes 2 dozen
Browned Butter Frosting
1/4 c. butter
1-1/2 c. powdered sugar
2 T. Milk
Melt butter in a saucepan over medium heat until it turns golden. Watch carefully as this will happen quickly. Remove from heat. Stir in powdered sugar and enough milk to make a spreading consistency.
Sunday, November 20, 2011
Through My Eyes
We are living in a digital world, no doubt about that. I can remember my first digital camera, bought my sophomore year of high school, was a jaw-dropping 1.4 mega pixels. Today, this is considered a dinosaur, and my phone takes better pictures than that. I have a digital camera, but it all honesty, it's so much more work to download and move pictures from a digital camera, let alone the fact that as soon as you buy a camera it's obsolete, so 9 times out of 10 I end up using my phone to take pictures (including those for this blog.) With that in mind, I was fascinated when I found a link to photojojo's interchangeable lenses for iPhone. No kidding, these people make camera accessories for mobile phones, amongst a ton of other things. It's like living in an episode of the Jetsons. When I saw their macro/wide-angle lens, I knew I had to have it. The telescopic and fish eye lenses looked fun too, but not as useful in every day life. And so, I ordered.
Like 3 days later, I check my tracking number and HUZZAH! It was in Waco! From South Dakota! And I shipped the slowest possible! HOLLA. I got really excited. I checked my mail. Nothing. I had my old roommate check a few days later. Nothing. I thought maybe it was being forwarded to my new address, even though I sent it to my PO Box. Nothing. FINALLY, today, it made its way into my PO Box, and old roomie brought it to me at work. Thanks, Waco Post Office... Gah.
Anyway, I immediately tore into the package, which bore this hilarious label:
I thought it was hilarious. And then I opened it and realized it was because they actually include a dinosaur toy. I. Was. Ecstatic. I <3 you, photojojo. It also proved useful for playing with the lenses!! And so, I give you the comparisons!
Here, we see Dino's face, au iPhone natural:
Yeah, what is that?
Now, with the lens!
What!!?? For serious. It's that good. And I didn't even bother to really hold still or make an effort at taking a good picture (I'm at the desk at work, playing with this excitedly and hurriedly.) That lens is totally worth it. I can't wait to play with it more! I especially can't wait to try it out with my fishtank!
The lens is a two parter, and comes with the wide-angle too. I didn't really care much about that one, it was just kind of a bonus, but it seems really neat too!
Here's before:
You can see I am very busy.
And now with the lens:
Holy crap! That's held in the same position. And you can see Mr. Dino there at the bottom now! Amazing! The only downside is that you can see the edge of the lens because of the curve of the phone, but I knew that before I bought it (they state it on their site, which is really nice.)
All in all, I am more than pleased, and I can't wait to play with it more!
Two thumbs up to photojojo!
~Sarah
Like 3 days later, I check my tracking number and HUZZAH! It was in Waco! From South Dakota! And I shipped the slowest possible! HOLLA. I got really excited. I checked my mail. Nothing. I had my old roommate check a few days later. Nothing. I thought maybe it was being forwarded to my new address, even though I sent it to my PO Box. Nothing. FINALLY, today, it made its way into my PO Box, and old roomie brought it to me at work. Thanks, Waco Post Office... Gah.
Anyway, I immediately tore into the package, which bore this hilarious label:
I thought it was hilarious. And then I opened it and realized it was because they actually include a dinosaur toy. I. Was. Ecstatic. I <3 you, photojojo. It also proved useful for playing with the lenses!! And so, I give you the comparisons!
Here, we see Dino's face, au iPhone natural:
Yeah, what is that?
Now, with the lens!
What!!?? For serious. It's that good. And I didn't even bother to really hold still or make an effort at taking a good picture (I'm at the desk at work, playing with this excitedly and hurriedly.) That lens is totally worth it. I can't wait to play with it more! I especially can't wait to try it out with my fishtank!
The lens is a two parter, and comes with the wide-angle too. I didn't really care much about that one, it was just kind of a bonus, but it seems really neat too!
Here's before:
You can see I am very busy.
And now with the lens:
Holy crap! That's held in the same position. And you can see Mr. Dino there at the bottom now! Amazing! The only downside is that you can see the edge of the lens because of the curve of the phone, but I knew that before I bought it (they state it on their site, which is really nice.)
All in all, I am more than pleased, and I can't wait to play with it more!
Two thumbs up to photojojo!
~Sarah
Shoes, Shoes, Shoes
No doubt about it, I am a total girl when it comes to shoes. I love shoes. I hoard shoes. I was rightfully born on the same day as Imelda Marcos. I wouldn't go so far as to say shoes are my life, but I do get great satisfaction from the purchasing and wearing of a plethora of shoes.
I get shoes from many, many places. Some are gifted to me, some I purchase (a rarity), and some I thrift. In fact, some of my favorite shoes are from the thrift store. Including this pair:
First, you locate your sad pair of shoes. Check! Then, you gather supplies.
(Not shown: Clear spray paint)
I used matte Mod Podge, Tacky Glue, and a really fine glitter. You can use whatever glitter you want really. I just wanted these a little more subtle, and less Dorothy.
I get shoes from many, many places. Some are gifted to me, some I purchase (a rarity), and some I thrift. In fact, some of my favorite shoes are from the thrift store. Including this pair:
This was a lovely pair of Dollhouse cherry red flats that I found in a Goodwill in Ohio. They're glorious. They're comfortable, cute, and who doesn't want a bright red pair of shoes? Well, I love these so much, they are definitely looking rough around the edges. Not only have I completely worn the lining out, but I almost cried when I saw this happen:
Oh noes! Total blowout. Not going to lie, I've been wearing them in this condition for... a while now. Finally, I decided I'd looked enough like a hobo, and either I would have to fix them or get rid of them (NOOOOOOO!) So, taking what I'd learned with making glitter flats for my niece, I decided that glitter would cover a multitude of sins. And so the process began! There are only a few short steps to this process, but I have to say the results are fantastic!First, you locate your sad pair of shoes. Check! Then, you gather supplies.
I used matte Mod Podge, Tacky Glue, and a really fine glitter. You can use whatever glitter you want really. I just wanted these a little more subtle, and less Dorothy.
Step Two: Glue!
Working in sections, cover your shoe in tacky glue. Make sure it's not too thick or it will slump (trust me.)
Step Three: GLITTER!
Whoa baby! I did this over a bowl so that I could just dump the excess back in. Except the lid of my jar didn't come off. But still. Bowl is a good idea. After you've worked your way around the entire shoe, let it dry thoroughly. I watched a movie.
Step Four: Glitter lock down.
At this point, you could probably stop. However, I do not want glitter shedding everywhere whenever I walk (as magical as that sounds.) I also wanted them a little less sparkly and a little more mature looking. I decided, based on my experiences with the niece's shoes, to give them a good clear coat of spray paint. This held down the glitter, and also made it a little less obnoxious. And now, the final result!
TADA! One shimmery red pair of shoes!
With no insides peeking out!
I have to say I was very pleased with the way these came out. I also went on a rampage and made new linings, as you can see! Those were super-simple to do. I used the sole of another pair of shoes (which I also recovered) and traced around it on a piece of doubled-over fabric.
That's really all there is to it. I used pinking shears so I would get a pretty fray-free edge, and it also looks cute. Not a huge deal if you don't have them, as you just slap down a layer of glue, let it dry, and then put Mod Podge over top to seal it in. I ended up doing two more pairs like that, a beige pair (which is where my pattern came from, and a black pair. I think they ended up looking great.
So, if you have a pair of shoes that you love, and they seem to be giving up the ghost, don't let them go until they're REALLY worn out ;-) Remember: Use it up, wear it out, make do, or do without! I usually chose the make do, and make it FABULOUS!
Looking forward to a great week!
~Sarah
Thursday, November 17, 2011
Day Dreaming
I have a problem. A farm problem. Namely, that I
don't have a farm. Really, at this point in my life, there is nothing I
want as much as just being able to support myself (or a family) with
good foods, happy animals, and handicrafts. That's it. The zenith. The
pinnacle. My biggest dream. And before you go telling me all about how
farm life isn't glorious, it's poopy, and muddy, and labor-intensive,
let me tell you that I know. I know. I've been through it all. All the feces. All the death and carnage (chickens manage to get themselves eaten
so often.) All the waking up in the middle of the night, or the
crack of dawn. And I still love it and want it more than anything. Being
involved with farms has been the most satisfying aspect of my life so
far. My degree doesn't hold a candle. I'd rather wake up every 3 hours
to check on pregnant ewes and experience the absolute endorphin rush of
bringing new life into the world any day.
In fact, if I could just trade my degree for a few ewes and some land, that would be great. Because, therein lies the problem with my farm dream: all my education and working since I was, oh, 15, has gotten me no closer to being able to attain my farm dream. Farming, unfortunately, needs heavy investment upfront. I neither own capital, nor qualify for loans. Sometimes it's no fun being single, 25, and a woman in a ridiculously low-paying position.
So what do I do? Do I spend the next 5 years going through grad school so I can get a job that would give me enough income to either be able to finance my own dreams, or at least qualify for a mortgage, only to find that the job that allows me to pay for my dreams also keeps me from having the time and energy to fulfil them? Do I sell my soul for acreage and a hog?
I have yet to do either of those things. Not that I haven't thought about both. Instead, I've been living a pseudo farm life and living vicariously through other people's joys, in real life and in the blog world. This is not a joke. I sit in my office, in a $1,000 ergonomic chair that gives me sciatica, and I dream of having 5 flat acres to call my own, hauling around hay, feed, and poop all day. I also do slightly more sane things like keep chickens on a friend's property (they used to be in my yard until I moved to a townhouse), have an angora rabbit in my room for fiber purposes (and adorable bunny snuggles), grow whatever I can in pots, and try to support local agriculture where I can. I said slightly more sane.
A CSA share for me probably wouldn't be worth my while (I'm weird about what veggies I like, I would want to have the choice), but I do grow what I can and hit up the Richmond Farmer's market when I can drag myself out of bed that early (I'm a night shifter.)
And today, I crossed a new threshold of my farm dreams: I paid for my very first cow share. BLISS. What's a cow share? You're basically buying controlling interest in a cow, and in return for your $25 a month for boarding and feeding, you are *gifted* a gallon of raw, unpasteurized, unhomegenized, glorious, glorious milk. Gifted, because selling raw milk is illegal. Glorious because LOOK AT THIS.
Wishing you all luck with your dreams too.
~Sarah
In fact, if I could just trade my degree for a few ewes and some land, that would be great. Because, therein lies the problem with my farm dream: all my education and working since I was, oh, 15, has gotten me no closer to being able to attain my farm dream. Farming, unfortunately, needs heavy investment upfront. I neither own capital, nor qualify for loans. Sometimes it's no fun being single, 25, and a woman in a ridiculously low-paying position.
So what do I do? Do I spend the next 5 years going through grad school so I can get a job that would give me enough income to either be able to finance my own dreams, or at least qualify for a mortgage, only to find that the job that allows me to pay for my dreams also keeps me from having the time and energy to fulfil them? Do I sell my soul for acreage and a hog?
I have yet to do either of those things. Not that I haven't thought about both. Instead, I've been living a pseudo farm life and living vicariously through other people's joys, in real life and in the blog world. This is not a joke. I sit in my office, in a $1,000 ergonomic chair that gives me sciatica, and I dream of having 5 flat acres to call my own, hauling around hay, feed, and poop all day. I also do slightly more sane things like keep chickens on a friend's property (they used to be in my yard until I moved to a townhouse), have an angora rabbit in my room for fiber purposes (and adorable bunny snuggles), grow whatever I can in pots, and try to support local agriculture where I can. I said slightly more sane.
A CSA share for me probably wouldn't be worth my while (I'm weird about what veggies I like, I would want to have the choice), but I do grow what I can and hit up the Richmond Farmer's market when I can drag myself out of bed that early (I'm a night shifter.)
And today, I crossed a new threshold of my farm dreams: I paid for my very first cow share. BLISS. What's a cow share? You're basically buying controlling interest in a cow, and in return for your $25 a month for boarding and feeding, you are *gifted* a gallon of raw, unpasteurized, unhomegenized, glorious, glorious milk. Gifted, because selling raw milk is illegal. Glorious because LOOK AT THIS.
Yes please.
Why is it more orange-y towards the top? That's the cream that's
risen. Holy god. I ate it with a spoon. Miriam is my cow's name. Today I
went and met Miriam, and even gave a good effort into milking her (she
was almost totally dry though. Her weaned calf is apparently not really
weaned.) Even though it was 9 in the morning, pouring rain, and I was in
a barn, it was, again, one of the most satisfying experiences of my
life. Feeling warm cow under your cheek and smelling wood chips and
fresh milk is probably the best way to start any day. I so admire Lisa,
the farm owner. I want to be her. I just hope that all my dreams aren't
stifled and shut away, like dreams often are. Hopefully the chickens
will keep me on my toes ;-)Wishing you all luck with your dreams too.
~Sarah
Wednesday, November 16, 2011
Thanksgiving Cooking.
Well guys I think I am going to be moving my posts to Tues and Weds, at least until football season is over because it is so hard to remember to post after a riveting day of football! So, usually I bake the sweets for my families Thanksgiving feasting! This year is no different! I am going to be making a Chocolate Silk Pie, a Pecan Pie, and a Pumpkin Pie. Here are the recipes for your drooling enjoyment!
Perfect Pumpkin Pie
Ingredients
- 1 can (15 oz.) pumpkin (about 2 cups)
- 1 can (14 oz.) Sweetened Condensed Milk
- 2 large eggs
- 1 teaspoon ground cinnamon
- 1/2 teaspoon ground ginger
- 1/2 teaspoon ground nutmeg
- 1/2 teaspoon salt
- 1 (9-inch) unbaked pie crust
Preparation
- HEAT oven to 425°F. Whisk pumpkin, sweetened condensed milk, eggs, spices and salt in medium bowl until smooth. Pour into crust.
- BAKE 15 minutes. Reduce oven temperature to 350°F; bake an additional 35 to 40 minutes or until knife inserted 1-inch from crust comes out clean. Cool. Garnish as desired.
Pecan Pie
Ingredients
- 1 1/2 cups pecan pieces
- 3 large eggs
- 1 cup sugar
- 3/4 cup light or dark corn syrup
- 2 tablespoons melted butter
- 2 teaspoons vanilla extract
- 1/2 teaspoon salt
- 1 (9-inch) deep-dish frozen unbaked pie shell
Preparation
- 1. Spread pecans in a single layer on a baking sheet.
- 2. Bake at 350° for 8 to 10 minutes or until toasted.
- 3. Stir together eggs and next 5 ingredients; stir in pecans. Pour filling into pie shell.
- 4. Bake at 350° for 55 minutes or until set, shielding pie with aluminum foil after 20 minutes to prevent excessive browning. Serve warm or cold.
Chocolate Silk Pie
Ingredients
- Crust:
- 1 (10-inch) Piecrust or 1/2 (15-ounce) package refrigerated pie dough
- 1/2 cup sugar
- 1/2 cup unsweetened cocoa
- 1/3 cup all-purpose flour
- 1/4 teaspoon salt
- 1 3/4 cups 2% reduced-fat milk
- 4 ounces semisweet chocolate, chopped
- Meringue:
- 5 large egg whites
- 1/4 teaspoon salt
- 1 1/4 cups sugar
- 2/3 cup water
- Grated chocolate (optional)
Preparation
- Prepare and bake Piecrust in a 10-inch deep-dish pie plate. Cool completely on a wire rack.
- To prepare filling, combine 1/2 cup sugar, cocoa, flour, and 1/4 teaspoon salt in a medium saucepan; stir with a whisk. Gradually stir in milk. Bring to a boil over medium heat, stirring constantly. Reduce heat; cook 2 minutes or until thick and bubbly, stirring constantly.
- Remove from heat; add chopped chocolate, stirring until chocolate melts. Spoon chocolate mixture into a bowl; place bowl in a large ice-filled bowl for 10 minutes or until chocolate mixture comes to room temperature, stirring occasionally. Remove bowl from ice.
- To prepare meringue, place egg whites and 1/4 teaspoon salt in a large bowl; beat with a mixer at high speed until soft peaks form. Combine 1 1/4 cups sugar and water in a saucepan; bring to a boil. Cook, without stirring, until candy thermometer registers 238°. Pour hot sugar syrup in a thin stream over egg whites, beating at high speed until stiff peaks form. Fold 2 cups meringue into chocolate mixture.
- Spread chocolate mixture into prepared crust. Spread remaining meringue over chocolate mixture. Chill 8 hours; garnish with grated chocolate, if desired.
Tuesday, November 15, 2011
Subscribe to:
Posts (Atom)