Tuesday, December 27, 2011

Resolutions?

For years I have made New Years resolutions that I couldn't keep. Like lose 50 lbs and other such absurdness. This year I am going to make some resolutions that I know I can keep. I resolve to expand my garden, experiment with vegetables I have never planted, and grow some fruit trees. And the #1 resolution I am going to make is to give my nephews lots of loves and kisses when they come home from the hospital. As you might remember they were born in October at 26 weeks. They are now almost at, and at the 4 lb mark. On Christmas day my Sister and Brother in Law were able to hold their boys for the first time! The anticipation of them coming home is growing and swelling in my heart daily!!! In January we will be throwing them and their parents a homecoming party since we weren't able to have a baby shower. Something else has been weighing on my mind as well on January 10th I will turn 26. I will be doing a lot of reflecting between now and then on both my past and future and goals I want to obtain!

To ring in your new year with luck and prosperity here is a nice recipe for Hoppin John!

  • 1 (16-ounce) package dried black-eyed peas
  • 2 large ham hocks (about 3/4 pound)
  • 2 tablespoons bacon drippings 
  • 4 cups water
  • 1 large onion, cut into wedges 
  • 1 teaspoon salt 
  • 1 teaspoon pepper
  • 1/2 to 1 teaspoon dried crushed red pepper
  • 1/2 teaspoon dried thyme
  • 2 bay leaves
  • 1 teaspoon minced garlic
  • 1 chicken bouillon cube
  • Hot cooked white rice 

Preparation

  1. Bring dried black-eyed peas and water to cover to a boil in a Dutch oven; remove from heat, and let stand 1 hour. Drain.
  2. Remove skin from ham hocks. Chop meat from ham hocks, reserving bones.
  3. Sauté meat in hot bacon drippings in a large skillet over medium-high heat 3 minutes or until slightly browned.
  4. Combine peas, meat, bones, 4 cups water, and next 8 ingredients in Dutch oven. Bring to a boil; reduce heat and simmer, gently stirring occasionally, 1 to 1 1/2 hours or until peas are tender. Remove and discard bones. Serve over rice.

Wednesday, December 21, 2011

Oh my goodness could it be!!!

4 days before Christmas!!!! Warning, if you have little readers you might want to send them away for this post.


This year my parents came up with a brilliant idea. Santa's special wrapping paper. Santa visits Diva at all houses, ours, Mema's, and Nana & Gda's. So, to make it really look like Santa visited all the houses my parents went and bought 3 rolls of the same wrapping paper to wrap a certain few of the presents Santa brings.

Since Christmas is so near here is a list of 5 things to do to make the build up to Christmas even more exciting! Have fun and See you next week!

1. Make Reindeer Food to put out Christmas Eve!

2. Make the cookies for Santa... Remember Santa might like a bit of bourbon in his egg nog!

3. Make your house smell like a winter wonderland!
3 cinnamon sticks
3 bay leaves
1/4 cup whole cloves
1 teaspoon ground cloves
2 lemon slices, fresh or 2 tablespoons dried lemon peel
2 tablespoons orange peel or dried orange peel
1/2 teaspoon ground nutmeg
1 quart
water
Mix all ingredients in medium saucepan. Simmer on low heat. Add more water as needed.

4. Sit the whole family down and read The Night Before Christmas or The Biblical Christmas Story. Or whatever your favorite Christmas or Holiday story is!

5.  Watch some Christmas movies with your family! If you ask my mom, this entails watching all the Die Hard movies...

Tuesday, December 13, 2011

She's going to be home for how long???? Christmas break.

If you are anything like me you are both excited and dreading the Christmas holidays. You are sure to hear "I'm bored" at least once a day on any given day. So here are some great ideas to help you entertain your little ones.

1. Make Crayons from all the old broken ones you have laying around. Here are a great set of instructions for doing it http://craftingagreenworld.com/2009/02/05/old-broken-crayons-not-anymore/

2. Wait til it gets dark and go Christmas light hunting. To make it even more fun create a scavenger hunt or bingo game out of it to see who can find the most or different kinds of decorations.

3. Make Kool-Aid play dough, not only is it already colored it smells good too. Instructions here http://runwithglitter.blogspot.com/2011/08/kool-aid-play-dough.html

4. Make home made Moon Sand, this stuff is so much fun and stores really well. Instructions here http://www.playbasedlearning.com.au/2011/03/moon-sand-recipe/

5. Pull out all the board games and have a family board game party while watching your favorite holiday movies!

6. Make these http://www.pre-kpages.com/christmas-tree-math-printable/ super yummy Christmas trees for that extra little sugar rush we all could use this time of year.

7. Make cookies to give to family and friends!

8. I use to love making ornaments as a kid, so make some with yours! Here is a great recipe for Salt Dough Ornaments http://www.katyelliott.com/blog/2009/11/diy-salt-dough-ornaments.html

9. On Christmas eve make Reindeer food! http://kidscooking.about.com/od/christmasrecipes/r/reindeerfood.htm

10. Finally, during the Christmas holidays, much like summer vacation all the stuff that was learned during the school year might start slowly leaking out of small brains. So to fight against this leakage read read read, if you have little ones read to them, here is a great site where kids can have actors reading books to them. I saw this website while watching The Chew which is one of the greatest daytime talk shows ever, look it up. http://www.storylineonline.net/ For older kids have them read aloud to you, make it a challenge by placing an amount of books to read by the end of the holidays and reward them if the goal is met!

See you tomorrow!

Monday, December 12, 2011

Let's go Cherpumple-ing

Do you ever find yourself invited to a holiday party and you just don't know what to bring. Next time, consider the (not-so) humble Cherpumple! What's a Cherpumple you say... Well, it's pretty much the mongoloid child of the baking world. 3 pies are baked inside three cakes, which are then layered on top of each other. It's an abomination, in all honesty. It sounded ungodly, but some of my co-workers and I just really wanted to see this bad-boy in real life. And so we baked.

And baked.

And baked.

Cherpumple is not as easy, or as hard, as they make it sound, and so I will share with you our Cherpumple wisdom.

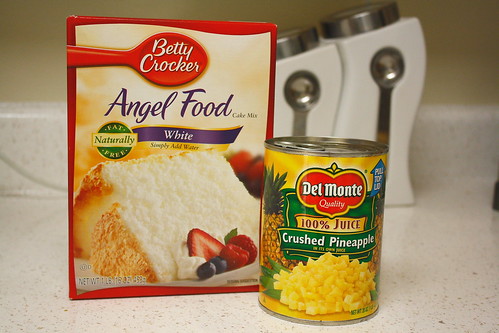
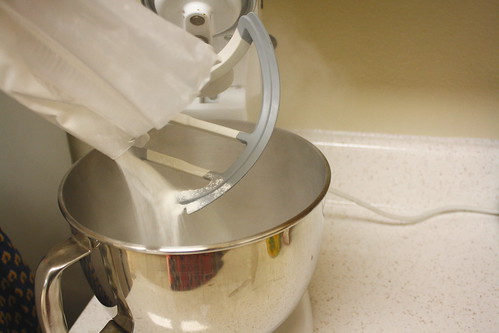
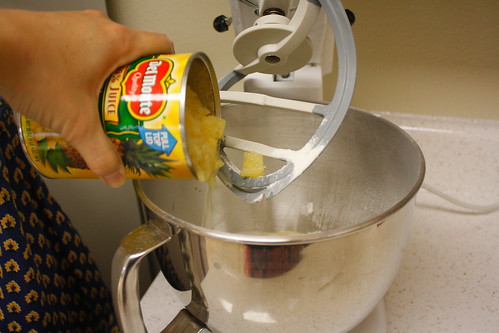
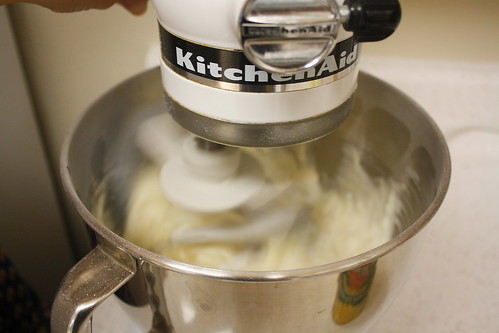
To start with, you take 3 store-bought pies (homemade if you're feeling fancy), and 3 boxed cakes. Mix the cake normally.
We're still excited here.
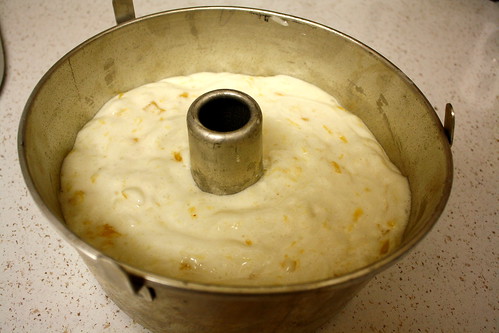
 You then combine the pies and the cake in a 9" spring form pan. Here's Word of Wisdom #1: Put some cake mix in the pan first, and then lay the pie in that. This keeps the bottom of the pie from dropping out of the bottom when you take it out.
Trust me
Also, Word of Wisdom #2: If your pie has a solid covering (like apple), poke a bunch of holes in the top crust. This will fill it with cake (yum) and keep it more structurally stable.
Mutilated pie
Most Cherpumple directions then say to bake according to box directions. This is a blatant lie. We put ours in for 25 minutes, like the box said, and checked back every 15 minutes after that. It took 2 hours total. That's a lot of 15 minute breaks. 
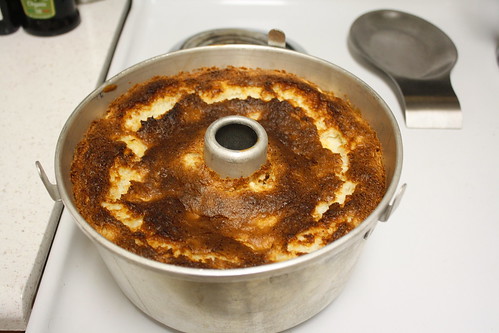
Word of Wisdom #3: Cover the entire pan with tin foil, tent-like. This traps the heat a little better and helps the top to cook. We didn't do this and pulled ours out, thinking it was done. It was not. It was raw on top.
Gross

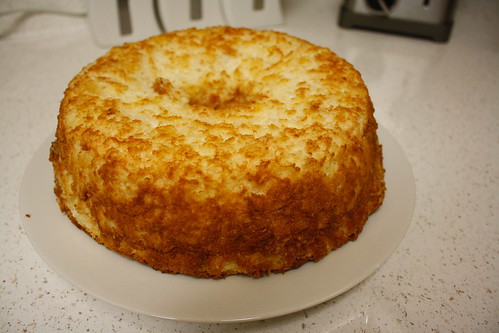
I try not to give friends salmonella. So, two hours later, they were finally done.

Let the cakes cool completely. We put ours on wire racks to help it out. Taking the cakes out was actually very easy. You just remove the sides of the pan, put a cutting board on top, and flip the whole thing. I then flipped mine again onto the rack to cool some more. It's a lot of flipping, but it's worth it. They are also ridiculous.
That's three and a half pounds.
We then just made some basic butter cream frosting and stacked the cakes.
That's a foot of cake
A layer of icing on the outside...
And an absolute hailstorm of sprinkles later...
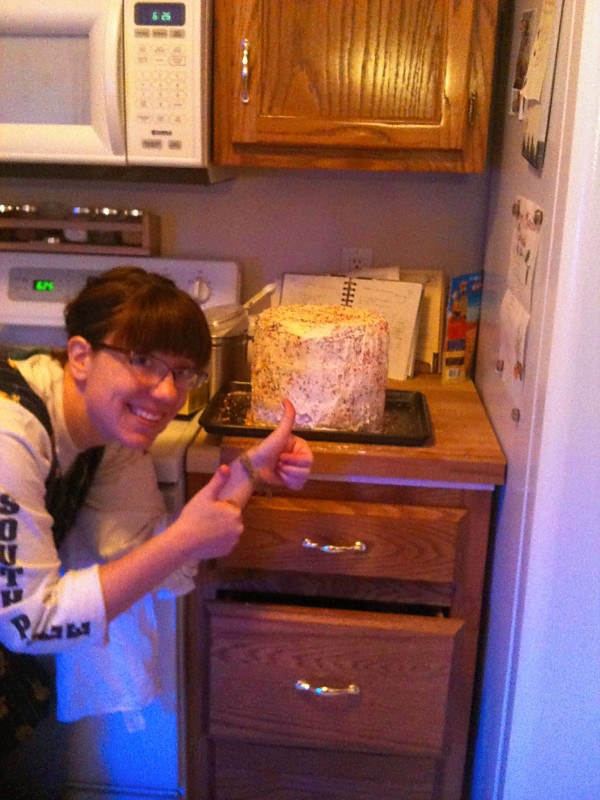
And it was done. Total time: Probably close to 6 hours. Literally. Cherpumple is a 2-day operation.

Cherpumple also takes two people to transport. You have to sit in the car and have someone hand it in to you. It weighs about 15 pounds. It's a big cake.
Cutting it takes a big knife. But it's like a Geology lesson in there.
All-in-all, Cherpumple was worth it. Until halfway through a slice when I wanted to cry, or throw up.
Some baked goods were meant to be enjoyed in small doses.

I wish you all the best of luck on your Cherpumple adventures! Feel free to share your tips and tricks (and photos!) with the rest of us! Any unusual pie/cake combinations out there?

Happy Monday everyone!
~Sarah


Thursday, December 8, 2011

Thrifting GOLD


Hey guys! Finally getting around to showing you all the stuff I got over Thanksgiving. Everything came from an awesome place called Grandmother's Attic in Bowling Green. It's a treasure trove of the awesome, random, and usually low-priced. So let's get to it!

The first thing that really caught my eye was this beauty.
A shiny retro breadbox. It was in pretty good condition, just a little bit of rust and some dirt, but no big holes or anything. The inside still has the shelf and the wooden lining for the door.
It was only $5! We went to another shop later and I saw the same one, but missing the shelf and not as shiny, but theirs was $20! Score!

I also got this cool green lock box. Unfortunately when I scrubbed some dirty spots it took a little of the finish off. I think it was like $2. Perfect inside, and still has the key.
This pile of bits is actually a shelving unit that attaches to the wall. I'm looking forward to rebuilding it and painting it. I think it was $5. I love how ornate it is. Kind of looks Swedish.
The store had several nice blue mason jars, but I really loved this shape. It's very unique, and it was only $4.50 for the quart (no lid.)
I just thought this little cottage frame was adorable. And it was $1.
This belt is adorable. It's missing a little bit of enamel, but I'll just fill it in. $1.
 I thought this retro 70's tablecloth was just sunny and cheery. And $2.
And then, my find of the day! A mini vintage cathedral window quilt. All hand stitched. Lovely. And $2.
 Love love love. Here's some detail.


For just some happy, here's a picture of Boo Boo, chilling with me on the bed. He's been doing this every night. It's unbearably cute.


In other news, my cow share is possibly the best thing that has ever happened to me.
I gave one jar to a friend, and we both got over a cup of cream from each half gallon. I made butter out of mine in the food processor, which was possibly the easiest thing I've ever done. No more shaking a jar for me! (Except in case of zombie apocalypse, in which case I'll need all the arm muscle I can get.) I used the buttermilk to make biscuits, and also made a pot of chicken and dumplings from scratch (not from one of my girls. Kroger had whole chickens on sale though.) I've been reading this book
which I got through Inter Library Loan. I'm in love with it. If you've ever wanted to make any kind of dairy product at home, this is definitely a good place to start! I'm thinking of starting some yogurt incubating tonight, and possibly making some queso blanco this weekend if I get to it!

Well that's all for now, folks! Have a great weekend!
~Sarah


Wednesday, December 7, 2011

Kinda frightened....

Today my little Diva went shopping at her school's Christmas store. I am a little scared. Last year we received some very odd gifts from her. I received a absolutely horrible necklace that I don't think I even took out of the package, Husband and Gda received a remote control toy 4 wheelers, Mema got a plastic rubber ring, and I can't even remember the rest of the things we got. So, to offset these gifts I usually take her to the Dollar Store to pick out more appropriate gifts from her. I wonder at this moment if our parents were as scared to receive what we got them from our Christmas stores at school...

Today I have a little project perfect for the little ones in your life! Have a ball and be sure to share your pictures if you try this!

Snow Paint
Mix equal parts men's shaving cream and white glue in a bowl. Cut shapes out of card stock or other heavy paper and let the little people use their hands to finger paint the shapes. The glue in the shaving cream when it dries makes an awesome texture!

Tuesday, December 6, 2011

A little holiday pick me up!

I love smoothies! They are wonderful when you need a quick energy pick me up, and during the holidays who couldn't use one. I use frozen fruit usually from the freezer section of Walmart. I do this because its convenient... I know, bad hippie.... I also adore my single serve blender! There are like 20 bucks at your local big box store! So here is my super easy smoothie recipe, around a cup or more of frozen fruit, 1 cup of milk, 2 tsp. sugar, and Greek Honey Yogurt! Yup, that easy! Right now, as I type this I am enjoying a Mango smoothie!

And now for today's holiday recipe! In the thought of being easy here is a great super simple cake recipe!

Ingredients
1 Angel Food cake mix
1 20oz can of crushed pineapple
ingredients
That’s it. Seriously.
Directions
1. Pour cake mix into bowl.
dry in
2. Add pineapple, with juice.
pineapple
3. Mix for however long your cake mix box tells you to.
mix
4. Pour into an ungreased tube cake pan OR two loaf pans. You can buy the disposable loaf pans at the grocery store if you don’t have a ridiculous cake pan collection like I do. It’s a sickness.
in pan
5. Bake according to the box directions. The top (or bottom, technically) should be golden brown. This is not a cake you want to undercook. You need to turn the cake upside down as soon as you take it out of the oven and let it cool completely. Or turn it upside down just after you took a picture of it. I swear, I flipped it.
baked
6. Once it’s completely cooled, run a knife around the edge, turn your cake pan upside down to release the cake.
cake

Thursday, December 1, 2011

When the laptop is down everything goes to poo. I'm back now though!

Sorry I haven't been posting, but my laptop has been in the shop. I am back up and running now, and I have a great craft that is semi inexpensive... Mine cost me around 10 dollars, which is pretty cheap compared to how expensive it looks. Everything for it is from my favorite place, the dollar store! The craft is a Christmas Tree Ball ornament wreath. I am not going to post the full on tutorial for it this evening, plus it has already been done, here is the link http://www.eddieross.com/eddie_ross/2008/12/no-wire-hangers-well-maybe-just-one.html Here is a pic of my completed project, and some pics of all of my Christmas decor!!!


Today's special cookie recipe looks sooo yummy, I think I am definitely going to put it on my to bake list. 
Chai Tea Eggnog Cookies

Ingredients

  • 1 chai tea bag
  • 1 (17.5-oz.) package sugar cookie mix
  • 1/2 cup melted butter 
  • 1 large egg 
  • 4 tablespoons eggnog, divided 
  • Parchment paper
  • Cinnamon sugar
  • 1 cup powdered sugar
  • 1/2 teaspoon freshly grated nutmeg

Preparation

  • 1. Preheat oven to 350°. Remove tea leaves from tea bag; discard bag.
  • 2. Stir together tea leaves, cookie mix, butter, egg, and 2 Tbsp. eggnog until well blended.
  • 3. Drop dough by tablespoonfuls onto parchment paper-lined baking sheets. Flatten dough slightly with bottom of a glass dipped in cinnamon sugar.
  • 4. Bake at 350° for 8 to 10 minutes or until lightly browned. Remove from baking sheet to a wire rack, and cool completely (about 10 minutes).
  • 5. Whisk together powdered sugar, nutmeg, and remaining 2 Tbsp. eggnog until smooth. Spoon over cooled cookies.