Monday, August 29, 2011

Saucy Lady

So, about a week ago, I bout a $5 basket of roma tomatoes from a Mennonite farm in Scottsville.


I was pretty darn excited since my roma plant (which took forever to find, because they all looked terrible) was the first to get eaten by something. So, I finally got around to doing something with them today. Sort of following this recipe, I tried first to put them through the food mill. No dice. So, I blanched, cooled, peeled, and de-seeded an entire basket of tomatoes. Because I am a crazy person. I made a hot mess of the kitchen (spilled tomato juice everywhere, seeds and juice splattered far and wide), but in the end, I wound up with a huge bowl of skins and seeds for the chickens (happy girls!), a good amount of tomato juice, and a huge bowl of tomato meat.


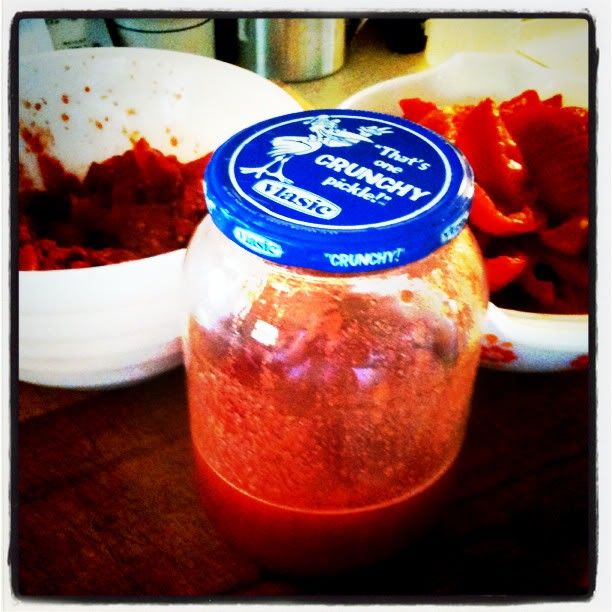
Not bad, before work!

Tonight when I get home, I'll cook them down, and see what I come up with. Tomato sauce is pretty much impossible to mess up. Anything that's mushed up tomatoes is good with me.


In other garden news, look what I found!!
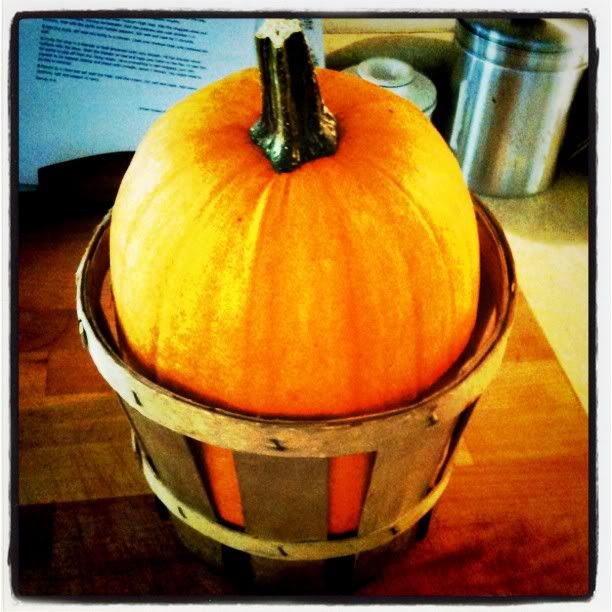


It's MAGICAL.

My first pumpkin to grow successfully, to full term. I had one that I accidentally knocked off the vine too soon (it was adorable too...), and one that had gotten nibbled from the underside which went to the chickens. But this one is perfect. The vine had dried up, but it made it through. I'm so proud. Now I need to decide what to do with it. I don't think it will last long enough to carve, so I'll probably eat it.


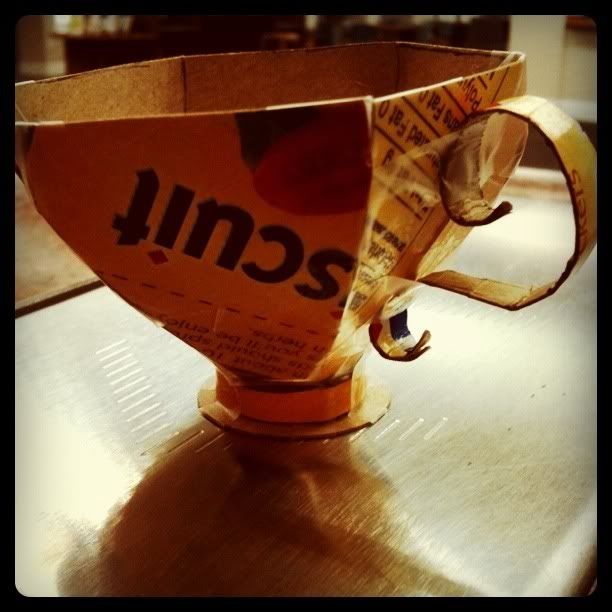
In crafty news, I finished the entire tea set that goes with the cup I made the other day!! The tea cup pattern can be found here, and the tea pot and saucers come from this site. I just used white tissue paper to paper mache it, since I actually really liked the look of the box art. Are you ready for this? Cause really... it's amazing...


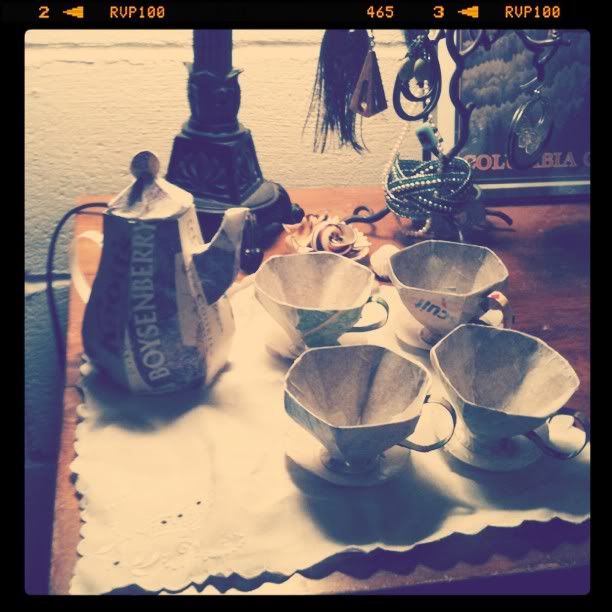
Oh yeah. I'm that good.

I'm keeping this one for me (Oh, the Boysenberry tea pot!!), but I've already cut out another to make for some very special little ladies in my life... Hopefully they enjoy it as much as I do!!

Sunday, August 28, 2011

Using technology to help children learn.

Hey guys, we here at the Thrift house are a pretty techy bunch. Friday we had a parent teacher conference with Cheyenne's teacher to kind of see where she is with different aspects of the class. She is having some trouble with her letters, numbers, and with phonics. So I started to think of ways that could help her other than the usual flash cards. Then I remembered oh yeah, I own an android phone, a android based tablet, a laptop, and an iPod touch, there has got to be resources out there that can help her with the millions of apps and programs. So off to the search I go with the simple want that it needs to be free, I don't want to spend money on something when she might get bored with it to quickly. And these are my findings to share with you. Android really doesn't have much to offer unless you want to pay 3.99 or more for simple letter and number games. The free versions only seem to go up to the letter h and the number 5. On apple it is nearly the same, except where android has actual games in its free versions, apple apps don't even have that. This brings me to the laptop. I have found a ton of sites!!! Starfall.com is great for letters and phonics. Pbskids.org has a ton of different games on all different subjects as does disneyjr.com and nickjr.com, so in closing today I guess I think that the good old Internet still reigns supreme on the free kids education front. Sorry to be so boring unfoody and uncrafty today, but sometimes the kid takes my mind to different realms.

Saturday, August 27, 2011

What day is it anyway?

Hey, y'all!

It's been a busy week here in the Bluegrass! I've switched schedules to third shift because work is just insane, and now I'm off Fridays and Saturdays (although I'm working and it's Saturday... what gives!) All this craziness means I HAVE NO IDEA WHAT DAY IT IS EVER. So please excuse my 12 hour tardy posting. I'll try to get better.

So this week has been pretty tame, as far as the night shift goes. I've gotten a lot of time to just sit around and craft and talk to people, pretty much my favorite things. Some things I've worked on:


I've made a lot of wash cloths. I actually made two of these, and finished another one I had started a while ago in an organic cotton, which is deeelish. These are a cotton/acrylic Cascade, and I really like it. They wash well too.


I made a rag ball with some of the scraps from my men's shirt dishtowel project. I'll add more too it, and hopefully make a rug. I know I cut out more napkins and dish towels (I have one set out of 4 completed), but I honestly can't find them right now... Time to clean I guess.


This morning, I took my frustrations out on making paper mache teacups. At least the bones are put together. I'll paper mache it when I get home. It's been de-sensitized, for your safety, according to the picture ;-)

In un-crafty but still home-y news, a co-worker and I are thinking about moving in together next month. I've been going through home buying classes and applying for a mortgage, but it's a tough time to have almost no credit lines open :-/ Just in case I get rejected *again*, Codename L and I went and looked at two apartments in Lexington last night, and fell in love with this kitchen


It's a 3 bedroom, 2 1/2 bath in a great location, and he was only a little shocked by the number of cats (we told him we each had two pets to make it seem a little less like I'm a crazy cat lady.) It's definitely at the top of our budget, but it's lovely.


Crown moulding, FTW. It also has a garage!? The landlord said he would hold it for us if we put the deposit down, and he wouldn't list it until he hear yay or nay from us, which should be as soon as I hear back from the bank reviewing my loan! Unfortunately, I couldn't bring the chickens with me, but I think I might have a place to keep them at a friend's house in exchange for oodles of eggs :-) FINGERS CROSSED ON EVERYTHING, either house or apartment!!

Wednesday, August 24, 2011

Farm Update and my husband's newest plan.

For all that know my family you know that Shane is the money man and I am the free spirited hippie that wants the world to run on a barter system. Sadly my plan hasn't fully started working yet. So, what do you do when you need extra money to remodel the house, go somewhere fun, buy school clothes and supplies for the daughter, or in my case pay for my NFL season ticket? You start thinking of ways to make cash. Around here we have a wonderful place that you take metal to and they hand you money, simple right. But, where do you find this illusive metal? This is when my husband put on his thinking cap. On his families land there is an old mobile home, no one lives there, and kids have broken out all the windows, its an eye sore. So plan in hand he went to his uncle and asked him if he may take it down and get rid of it for him. He said yes!!! Though its going to be a lot of work, it will have big pay off in the end! Pictures of my rolling in cash to come... LOL.

In other news, its been a while since I updated you dear readers on the status of the garden. Over the past couple of weeks we have had wonderful rain, so everything is growing super fast, that includes the weeds. Here are new pictures in all of their glory. See you Sunday!!!


Monday, August 22, 2011

New Knitting Goods

Well, it's been a busy weekend, folks! I spent 3 days in Bowling Green, in western Kentucky, finally selling my roosters! Hurray! I love roosters, but I sure won't miss being woken up at 5 am.

While I was there, my friend, Jordan, gifted me a set of Denise interchangeable needles, which had previously been given to her. She didn't like working with them, but I am *thrilled*.


My excitement knows no bounds.


I did decide that its 1980's cover needed some updating.


Mmm, taupe marble!

So, if I lived in a country where it was legal to marry and inanimate object, I would certainly marry Mod-Podge. It has never let me down. I had a cool vintage-y looking piece of fabric laying around that actually matched the inside of the case (which is kind of beige), so I went to town!


Getting glued!

I put down a pretty good layer of Mod-Podge on the surface, smoothed the fabric over it, and then did a coat on the outside. I trimmed the fabric to fit, and did one last coat on the edges to keep it from fraying.

And here it is all dry! And I've already got a project cast on!


And here you can see that it doesn't entirely clash! YAAAY!!


Really not bad for 30 minutes of effort.

But of course, I couldn't stop there! I had a little tin that I had gotten from work (it used to hold staples) that I wanted to use as a new notions case. Soo...


I made it match too.


It has magnetic tape in the lid to hold all of my yarn needles. All of my fancy stitch markers are hooked on to my cable needle, so I can stop losing them. Even my x-acto fits when I take the blade off, so not razor vs finger accidents!

Hopefully I'll be able to stop myself from Mod-Podging EVERYTHING THAT MOVES.

Watch out ;-)

Wednesday, August 17, 2011

Blueberries and Remodeling.

Being a home owner is said to be one of the greatest thrills in a person's life, and it is. Shane and I bought our home 7 years ago for the low price of paying the back taxes, it is a 70's model mobile home, and I adore it. When we got it, we put about 1000.00 into it. That pretty much covered paint, floors and small miscellaneous stuff. We made some mistakes though and now we are having to pay for them. Mistake 1, we painted the entire house with flat paint. It is horrible! Mistake 2, we used peel and stick vinyl flooring tiles throughout the house. They are now peeling up, bubbling, and sliding around. So, we are remodeling, we are still in the planning stages so you don't get to see my house completely torn apart quite yet. Let this be a lesson to everyone who is thinking about redoing their home, think more of the longevity of your choices than the price it will cost. With all that said, I have colors chosen!!!!! Here they are in all of their glory!

The only color not pictured here is Cheyenne's room color, its pink, for all that know my diva you would understand.

In other news, I made the most divine cake over the weekend!!!! It is a blueberry upside down cake. Its perfect and can be eaten at anytime of the day! Even for breakfast! I found the recipe here http://oneordinaryday.wordpress.com/2011/06/27/blueberry-buttermilk-upside-down-cake/ Enjoy trying to lick it through the screen!!! See ya Sunday!


Tuesday, August 16, 2011

What's for dinner when you can't cook?

I love Patricia's ideas for meal planning. Having everything on a set schedule sounds heaven sent, but what happens if YOU aren't on a set schedule? Are you doomed to eating Taco Bell 4 meals a day? My job involves having a weird schedule, hands down. I usually don't get home until 9 or 10 o'clock at night, and I'm lazy and don't wake up until I absolutely HAVE to. So what's a girl to do when she wants to eat like a normal person, but not be banging pots and pans together at midnight?

Meet your best friend:


image from: http://www.psfk.com/wp-content/uploads/2008/10/freezer.jpg

Unfortunately, my freezer doesn't look like that. Honestly, my freezer is stuffed full of crap, including our chest freezer downstairs. Why? And what does this have to do with being lazy?

So, think back to your post-high school days... if you were anything like me, you probably lived off microwaveable frozen foods. Because they are easy. You know what else they are? They are just foods made and then shoved in the freezer to be reheated later. You know what you can do? Make burritos and shove them in the freezer. It's just that simple. No, they probably won't last until Armageddon like Totinos pizza rolls, but they are also much tastier if made with exactly the ingredients you like.

Personally, I do this with just about everything. Especially if you live on your own, this is a great way to cook without having to quarter recipes. I usually take a day on the weekend and cook a few different types of each meal, for example, I might make breakfast burritos, scones, and pancakes for breakfast, and then a few different types of lunch/dinner meals, like a soup, lasagna, or a chicken dish. This works great for taking your lunch to work, since you just have to pop something out of the freezer and it defrosts by lunch time. It's also great if you're lazy in the morning, because you can pop a homemade waffle in the toaster just as easy as an Eggo, and it's not full of terrible junk.

So last night, I can home and got in a cooking mood and made:


vegetable lentil soup.
Soup always looks terrible, but tastes so good.


Bacon Cheddar Scones


which turned out AMAZING. I'll post the recipe tonight. It was adapted from a metric recipe, so it's definitely a guessing game...

This morning, I paired one of those puppies with some fresh eggs, one of which had the most enormous yolk.


Thanks girls.

So don't be afraid of meal planning, even if you're a crappy planner, or "don't have the time." Cook it up as you get a chance, and pop it in the freezer! It'll save you a world of worry later (and you can choose from multiple things rather than sticking to a plan!)

**UPDATE**

Here's the recipe for the bacon cheddar scones, adapted from this blog.

1 1/3c flour
2 TBSP baking powder
salt & pepper
1/3 c butter, softened
1 egg
1/2 c buttermilk
1/3 grated cheddar cheese
BACON. The recipe calls for 4 slices. I used much, MUCH more. Like 1/2 lb.

In a bowl, stir together flour,baking powder,salt/pepper,cheese and bacon. Now pour in the egg,milk,yogurt and butter. Stir until JUST incorporated. With scones,you want to mix them as little as possible to keep them nice and tender. Over mixing = hard scones which is not good. So incorporate in the wet ingredients,and then turn out onto a floured board and shape into a circle using your hands. Slice the circle into 8 wedges. Brush each wedge with milk and sprinkle pepper on top. Bake for 15 minutes until golden brown on top and cooked through.
Makes 8 scones.

You might need to adjust the liquid/dry ingredients depending. I used a LOT more cheese and bacon. Just play with it. It's baking, not rocket science!

Sunday, August 14, 2011

What's For Dinner?

Today dear readers, I am going to talk you you about meal plans. Its not as glam as actual food products, but they are so useful! It doesn't matter if you are single or married, they keep a little order in the world. The example I am going to use is my actual meal plan for the next couple weeks. You can of course do them weekly, monthly, or as I do biweekly. The main thing to remember when using meal plans is, be flexible, just because it says on Tuesday we are having some kind of chicken that doesn't mean you have to eat chicken, you can have something else on your meal plan or go out. I think that is the main hiccup with most people, meal plans are not rigid, they can constantly change and evolve. I started keeping meal plans right after Cheyenne was born and I started running out of time and energy to run to the store every time I found something that we were out of that I wanted to make.
First things first, write down all of your or your family's favorite meals, these are your base that you can reuse on a normal basis. After you have these gathered you can start adding meals that you want to try. I usually write mine out in a notebook, but for this blog entry I went ahead and typed out everything. In a perfect world, I would have been able to load my excel doc. But, its not a perfect world.
Once you have everything written down, it time to make your grocery list. That, I am not putting up because its sooo long this go round. When writing out your grocery list check to see what is in the pantry, freezer, and fridge, if you have it don't buy it.
Well guys this is my bit for Sunday, I hope it is helpful. If you have any questions feel free to ask. Seeya Wed.

Sample Meal Plan : Biweekly

M:  Broccoli, Cheddar, and Chicken Braid
T:  Crockpot Mac and Cheese with Ham and Peas       Bake Bread
W:  Cowboy Casserole
Th:  Stromboli
F:  Home Alone                                                            Pear Crisp
S:  Buffalo Chicken Egg Rolls
Su:  Pizza Muffins with Dipping Sauce
M:  Broccoli Cheese Soup
T:  Bacon Ranch Crockpot Chicken, Green Beans        Bake Bread
W:  Beef Dip Sandwiches
Th:  French Toast, Bacon, Eggs
F:  Home Alone                                                            Strawberry Shortcake
S:  Enchiladas
Su:  Pizza

Friday, August 12, 2011

Book Fair

I believe I've mentioned before that I work in an academic library. It's not only tons of fun, but it also provides me, oddly enough, with oodles of supplies for various craft projects. We've been going through an enormous collection review, weeding out old, out-of-date books. Some are donated to different charities, but some are just beyond redemption and are recycled. A co-worker of mine, knowing my penchant for strange items that can be reused, pulled a book out of the recycling the other day, and of course that means PROJECT TIME.

You might remember my first Kindle cover that I made from a composition notebook.


Yes, I am brilliant.

That one cost me somewhere around 50 cents. Outrageous. I decided to use the book pilfered from the trash as Kindle cover v2.0. I really liked my composition book one, but it's just *slightly* too shallow. The velcro gives it enough space to cover the Kindle, but I'm terrified I'll crack the screen or something. The book that was found for me was definitely thick enough to be a little more protective.


Definitely.

And so...

I took this.


Yeah, not even I want to read this.

And so I got to cutting. And cutting. And cutting.

I cut the front part of the book to fit the Kindle, rounded edges and all. I'll probably sink some velcro down there too so that it closes flush (more on that in a later post.)


The front. Much neater this time.

There was a lot of book left over once I had cut deep enough to fit the kindle, and I wanted to get rid of some of the weight, so I left about fifty pages and then started cutting again.


Not as neat this time though.

That left the edge to keep it from getting crushed, but cut the weight by a ton. Maybe not literally. But still. All that's left to do now is glue all the edges together and affix the velcro! Hopefully I'll get it done tonight.

And so I leave you with this image:


What happens to patrons who don't return books.

I'm joking.

Or am I?

Wednesday, August 10, 2011

The Ancient Mystery of Bread

Bread, its been around forever, we eat it everyday, but yet so many people are intimidated by making their own. I am here to tell you ladies and gents, its not that hard, and you don't need one of those stupid bread machines. Kneading bread is one of life's little stress relievers. Oh and did I mention home made bread on a normal basis costs pennies compared to buying bread from the store. The recipe I found for regular daily loaf bread is pretty darn fool proof. As you will see in the pictures, I chose to make this weeks loaves with wheat flour, as I am trying to be a bit healthier. The recipe I am giving you can be used with any type of flour, I promise! The main thing is good yeast that is fresh. And I promise, cross my heart if you dear readers have questions, I will answer them quickly as I can. Here's the recipe! Have fun with it!

Triple Risen Bread

3 cups lukewarm water
1.5 tbs. yeast
1.5 tbs. salt
.5 cup honey
.25 cup melted butter
6.5 cups flour (any type you want, seriously)

Step 1: Mix the first 5 ingredients together.
Step 2: Mix in flour one cup at a time until flour is blended in.
Step 3:  Flour a surface.
Step 4: Dump mixture out on the floured surface.
Step 5: Knead dough until it is no longer sticky, you will need to add more flour while you knead.
Step 6: Put dough in a large bowl.
Step 7: Cover with a dry dish towel and let bread rise to double its original size.
Step 8: Take out and knead again on a floured surface.
Step 9: Put back in bowl and let rise again.
Step 10: Grease and flour 2 bread pans.
Step 11: Take brad out of the bowl, cut in half, and form to fit into loaf pans, put bread in loaf pans, seam side down.
Step 12: Let bread rise to double its size in the loaf pans.
Step 13: Preheat oven to 400.
Step 14: Cut top of bread down the middle for split top bread loaves.
Step 15: Bake for 30 minutes, turning halfway through baking for evenly baked loaves.
TADA!!!!!


While normal bread is fabulous, sour dough bread is down right amazing! So while I was making my normal loaves I went ahead and made some wheat sour dough starter. Here is a great link that can tell you alllllll about making sour dough bread. http://www222.pair.com/sjohn/blueroom/sour.htm Its not the most beautiful process, but the end product is what really really counts!

Well that's all for me today folks! See you Sunday!

Tuesday, August 9, 2011

Weekend Roundup!

Hello everyone!

It was a busy weekend! Two of my friends celebrated their 22nd birthday Saturday (they're twins!) That called for CUPCAKES! I used this recipe for chocolate cake and fresh strawberry frosting. I have to say, I really enjoyed this recipe! The frosting tasted just like strawberries, and was delightfully pink (I added more puree than the recipe called for, but didn't have any problems with it being too runny.) The cake was nice and soft, although I think next time I'll used dark cocoa, since I like it super chocolatey. And they're lovely.


Mmmmm.

I've been dorking around with making a "princess" dress for my niece. It's been fun so far using the inspiration and patterns in this book. There's a lot of trim involved, because I can't help myself!


It's going to be a fun one. Tracing and drafting out seam allowances, not so much. I really do like the book, but I wish they weren't "European" patterns. It's nice that you can do with them what you wish, but it would be nice to have at least the standard seam allowances worked in.

Since I'm on a normal schedule for the next two weeks, I got to play with the chickens in the yard yesterday afternoon. We don't usually let them roam free anymore, after we had an unfortunate encounter with a fox carrying off one of our Buff Orpingtons. We still have three of our originals, including these girls:


Meet Thelma (the Dominique) and Louise (the Buff Orpington.) They're quite the pair. They do everything together. Our other original hen, Glorious Raptor (a mixed breed) seems to like hanging with the younger ladies, who are a bit wilder. In the background, you can see this lovely lad:


His name was Zha-Zha (he was quite the fancy chick!) However, given that he has DEFINITELY started crowing, he needs a new name. I'm thinking Ghengis Khan. Something fancy and exotic still, but a little more fitting of his masculine nature. In the background of this picture, you can see Bambi and Poofy Cheeks, our two Americauna hens who are starting to REALLY look like chickens now! They should be laying here shortly too! I'm guessing they were born at the end of April, so they should be around 5 months old. I'm really looking forward to some neat-colored eggs! A gentleman stopped by Sunday while I wasn't home and was really interested in the chickens, so hopefully I'll be able to trade off my extra roosters (Khan, and a black one I've now named Michael Jackson) for some new hens! Not pictured is the rooster I actually intend to keep (at least for now), a lovely black-bodied Maran cross like Michael, but with lots of red feathers. He's also very shy, which I like in a rooster (no more spurs please!)

Well, that's all I have for today, folks. Look forward to Patricia's post tomorrow!

Sunday, August 7, 2011

Meet Helena

This Sunday dear readers there will not be feats of cake or jelly or even gardening! No, this Sunday I want to introducing you to someone that has been hidden away in our storage for way way to long. I have named her Helena, she is a 1979 Singer Creative Touch Fashion Machine 1030. I found her at an estate sale for a whopping 20 bucks with the intact desk, original manual, and all of the Singer accessories. It was a totally exciting buy when I got it 3 years ago, until I got it home and realized that I had no space for her anywhere in the house. As you might remember Wed. I got rid of a mountain of clothes and a dresser just to bring her in. So here she is, in all of her vintage glory.

Friday, August 5, 2011

CAKETOPIA!

I doubt it will be any surprise to you, our dear readers, to hear that I, Sarah Elizabeth, have...


a cake problem.


This is in small problem. We're not talking "Oh, I like a bit of cake on my birthday!" We're talking "HolycrapImakelikeacakeaweeksothatIcanhavecakeeverydayandsometimesmorethanonceaday."


Yeah. That bad.


I know it's a foolish endeavor to try and cure myself of this cake fever, and so I've been challenging myself to only make *friggin awesome cakes*. I feel like I've done pretty well so far. I usually make them from scratch (angel food with buttercream and raspberries for a friend's birthday), but sometimes I cheat (boxed cake with rainbow chip icing/chocolate for my own birthday!) However, Pinterest has really upped the ante, showing me pictures of AMAZING things to do with cakes.


Including this baby:


It's rainbow. Cake. In a jar.

Holy crap.


And so I must have it.


Five bowls of batter later, and I was on a roll.

The directions call for "neon" food coloring, but while I was shopping I saw that said food coloring was $4, almost as much as the 12 pack of reusable glass jars, and I gave a big "Oh no you di'int" in the middle of the grocery store. Also, the colors weren't that "neon", just ugly. Anyway!


Mine were messy, but looked like delightful rainbow pudding at this point (and were just as tasty.) I'm sure some of you are having *slight* concerns about my methods here... foreshadowing!

I popped these babies in the oven and took a peek a little while after to see if they needed to be turned (our oven bakes SUPER unevenly.) And I saw this:


You many think "Oh, lovely, puffy rainbow cakes!"

But at this point I was thinking "OH HOLY CRAP I FORGOT THAT CAKE RISES." You know how when you make cupcakes, you only fill them 1/2- 3/4 full? Well, the same rule holds for cakes made in jars...


Cake failure, in all the colors of the rainbow.

Now, I'm not going to lie, as much as I was disappointed in my cake failure, I was really looking forward to EATING ALL THOSE CAKE SCRAPS. After a bit of surgery (scraping the sides, and scooping out a little off the top), they were ready for icing!

Lesson:

Fill 1/2 full. Yes, you may want to see all the colors before they're baked, and you may think the purple layer isn't thick enough now, but just wait. Really.

I look forward to RAINBOW CAKES EPISODE 2, coming soon to a kitchen near you. Tonight however, is homemade chocolate cupcakes with strawberry frosting, for a double-birthday!!

Wednesday, August 3, 2011

Yummers!!!! Summer in a Jar!


I am posting later than usual today because I have been a very busy bee today. This year my garden produced a ton of watermelons, as I said in a previous post. I had so many that at the end of July I had 6 sitting on my kitchen counter and no idea what to do with them. Then I had a thought, what about making them into jelly! Off to the interweb I went to try and see if anyone else had this same slightly insane idea. Turns out several people have. The recipe I found was on http://www.foodinjars.com/, it is an amazing canning blog with tons and tons of really great recipes. When I juiced the watermelons Monday I ended up with 24 cups of watermelon juice. I quadrupled the original recipe which only called for 6 cups of the juice. Fast forward to today I went to the blog that I found the recipe on and it was gone, poof... Oh crap, so as quickly as I could I went searching for the same recipe somewhere else, and found it. http://www.whataboutwatermelon.com/index.php/2011/06/recipe-watermelon-jelly/ This website is nuts, its all about watermelons. I have taken tastes of it throughout today and I must say it is amazing! It tastes like summer in a jar! So for your enjoyment here are the pictures of Watermelon Jelly making, taken by my lovely and wonderful assistant Michelle!


In other news! I am now the proud leader of Daisy Girl Scout troop 30228!!! I am so excited! My momma is hopefully going to be my co-leader, so lots of fun to be seen from that!!! Also, today after I got done with my canning Michelle and I went through my clothes... I am a bit guilty of clothes hoarding, as in I never go through the stuff and get rid of things that I will never fit into again... Happily I am now down to 4 drawers, 3 small stacks of pants and shorts, and 1 small space in the closet for my hanging clothes. My reason for doing it now is so that I can get rid of one dresser in our room. With this extra free space we are finally going to bring in my big sewing machine, and make a crafting area for me! Yay!!! Seeya Sunday readers!!!

Monday, August 1, 2011

Books and Stuff

Hello everyone! Look at me, all posting on time. Today, I thought I would concentrate on more crafty-type things, since Patricia has the garden covered pretty well.

One thing to know about me is that I work in an academic library, which means several things:

1. I use interlibrary loan like it's my job. Mostly for craft and agriculture books. Pretty sure they're sick of seeing requests from me.

2. I spend a lot of my time at the front desk, waiting for people to need me, which means I have a bit of down time. Luckily for my ADD, they let me craft while I sit (usually, it takes less of my attention than reading or facebook.) I knit a lot, but any of my projects have to be small enough to tote around, and can't have a lot of "stuff" that they need.

Which led me to this book:


Not only is the cover rather lovely, but it's filled with fun projects that only require needle and thread, and a bit of patience. The project I chose is making dinner napkins from old men's shirts. A trip to the Goodwill fulfilled all of my fabric needs, and last night I measured and ripped everything out. Best part? Checks make for easy hemming! I also decided that rather than making a bunch of napkins from each shirt, I would make 2 from the sleeves and also a kitchen towel from the back (although this had to be fudged a bit when I realized that I bought ONE short-sleeved shirt! GAH!) Today, our software at work is being updated (all week actually) so I've been happily sewing away!

And so, I give you "The Men's Shirt Linens"


The button hole placket is seriously handy.


It makes its own napkin ring.


Also, a hook for hanging! (Yes, ,my calendar is still on July. That's pretty good for me. Also, I just love lemurs!)


Look a all that mad-crazy hand stitching!

Best of all?


It holds my toaster strudel perfectly :-)

In non-crafty news, I made a lasagna last night with my own tomatoes, zucchini, and garlic, and it was MAGNIFICO. Really tasty. I was quite proud, especially since I didn't really look up a recipe, just winged it!

I also put in a soaker hose this morning, since we've been getting almost no rain and 95 degree weather. Hopefully that will help out. I have bunches of tomatoes and beans ready now, cucumbers are still going, some baby peppers, and hopefully the pumpkins will make it through! I broke my cute little round one off on accident while trying to turn it, but I still have 2 big oblong ones, and I'm sure a bunch of others that I just can't see! Exciting stuff!